Sunday, 18 November 2012

Music and Movement~ Playing with scarves

 
Playing with scarves is such a wonderful sensory activity for babies and children alike.
 
When scarves are moving to music the baby or childs sense of sight is stimulated by tracking the bright colours with their eyes. The auditory sense is stimulated by listening to the music and the sense of touch is stimulated by the feel of the scarf on their skin.
 
They are also learning about object permance and developing motor skills.
 
Suitable ages: 0+
 
 
The best thing about scarf play is that it is so simple.
Most of us will have some scarves that could be used.
You can use sheer fabrics or solid. Any pieces of light material will do.
 

1. Play Parachute

 
Lay your baby down in a comfy position.
Put on some calming music.
Wave the scarf above your baby so that it is floating up and down.
 
 
Your baby may reach up and try touch the scarf!
 
 
Let the scarf drop so it floats down onto your baby.
 
What a magical sensation for your little one!
 

2. Play peek-a-boo

 
Peek-a-boo games are great for developing object permanance.
Object permanance is the knowledge that objects still exist even when they can't be seen. This skill is essential to cognitive development since only after a baby can imagine an unseen object can they remember, reason and plan.
 
See through scarves are great to use for introducing this game. Move onto more solid materials as your child becomes familiar with the game.
 
Read about another peek-a-boo game here hide-n-seekin fun
 
 
Be sure to put the scarf on yourself as well as soft toys and other objects!
 

3. Scarf in a tub

6months +
 
 
Simple and easy to make. Any container with an opening will do, tissue boxes are brillant.
Hide the scarves inside and let you little one have a great time pulling them out!
Better than pulling out the tissues lol!


4. Dancing

If your baby is not yet walking, simply put on some of your favourite (child appropriate) music, hold your baby in one arm and a scarf in the other and dance around to the music together.
Or, lay your baby down and dance the scarf around to the music for your baby to track with their eyes.
 
12months +
 
 
For older children let them explore the rhythm of music by dancing
free style with the scarf.
Let them experiment with how many ways they can move their scarf.
 
Can you make it go up and down, sideways, around and around?
Can you make the scarf dance on the floor or wave it high in the air?
Move your scarf like a rainbow.
Move your scarf slowly when the music is slow and quickly when the music is fast.
Throw your scarf up in the air then catch it.
Weeve the scarf through your legs.
 
The opportunities are endless!
 
How do you like to play and learn with scarves? Please share your ideas here.
 
Enjoy,
 
Play and Learn
 
Katey
 
If you enjoyed this post please feel free to share it, thank you.


Discover wet and dry = sensory play


Children respond better to learning experiences when more of their senses are involved.
Sensory experiences are wonderful opportunities for learning and they are so much fun!
 
On this day we were investigating wet and dry!
 
Goop is a wonderful sensory recipe for learning wet and dry.
It has been one of Miss M's favourite things to do since she was around 15months!
 
 
 We started with 2 large storage container lids.
 
Fill one with cornflour.
Let your children touch and play with the dry cornflour.
Talk about how it feels, what happens when you pick it up, when you drop it and when you blow it. How does it feel on your skin?
 
 
Miss M (3yrs) was reluctant to play with the dry cornflour but she happily used a paintbrush to draw shapes and pictures in it.
 
This is similar to using a


We also filled a 2nd large storage container lid with a little water.
 
It's hard to see the water but what a surprise for H man discovering it is wet!


He climbed straight in.

 
Splashing!
 
 
Taking a closer look.
He actually put his face and mouth right in. For babies, using their mouth is their favourite way to discover. This is because the sensations in the mouth are more highly developed in babies. For older babies, sensations from teething gums draws the babies attention to the mouth.
 
 
I added bottle tops to the water as a little extra experience and to stop him eating the grass lol!

 
We added some water to the cornflour.
 
Now is it wet or dry?
 
 
To Make Goop
 
Just like with most of my cooking I don't tend to follow exact amounts when making goop.
 
All you need is,
 
cornflour
water
food colouring
 
The more cornflour you use the more goop you will make. Simply add small amounts of water at time and play. You will understand as you play the strange and wonderful sensation that is goop! You will be able to judge when you have enough water. Be careful not to add too much but if you do, simply add more cornflour.
 
Unlike the dry cornflour, Miss M loved the sensation of the goop!
What happens when you pick up the goop?
 
 
You must try this!
 
 
I was surprised H man didn't get into the goop as much, he was happy with the water and bottle tops.
 
 
 Had to try this sensation out with our feet also!
 
 Make sure to,
  • Talk about what your children are doing, give them the language that represents what they are doing. Providing them with new vocabulary.
  • Ask questions about what your child is doing, feeling, seeing and experiencing. Give them time to answer. 
  • Ask predictive questions, what do you think will happen if...? If your child struggles with this model for them "I think maybe..."
  • Test it out and see
  • Follow your child's lead and where they want to take the play
  • Let them get messy and explore all their senses, this is safe and non toxic.
 
 
For more sensory play ideas for toddlers and babies you may be interested in


Enjoy,
 
Play and Learn
 
Katey
 
 
If you enjoyed this post please feel free to share
 

Tuesday, 13 November 2012

Fine Motor~ Playdough Beads and Pipecleaners


After seeing this on one of my favourite blogs Learn with Play at Home I just had to set up this invitation to play up for Miss M.

Miss M has been reluctant to thread in the past. She would get easily frustrated and can give up easily. I have tried numerous threading tasks including threading pasta onto pipecleaners. Pipecleaners are great for introducing threading as they 'poke' through more easily than your other threading materials such as silly string and wool etc.
I thought this would be an ideal activity to encourage threading through play!
 
Threading is such a wonderful task for developing fine motor skills and hand eye coordination.

Miss M was just turned 3yr's old and would recommend this one for 3+ with supervision.

 
I provided the playdough, pipecleaners and beads.
I decided to add some of our large wooden beads also.
I wanted to encourage threading and knew the larger beads would be a 'safer' option for her. I wanted her to gain confidence and master the skill before progressing on to the more difficult, smaller pony beads. 
 
 
The play began!
She liked pushing the smaller beads into the dough.
The bigger beads left great imprints in the dough.
 
 
And look! We have some threading!
 
 
Concentrating hard!
 
 
How creative!
 
This was so much fun that we will be playing again.
Next time we may even attempt to thread the smaller pony beads!!!
 
Warning: Always supervise young children when using small objects and choking hazards like pony beads.
 
Looking for some more ways to develop fine motor and creativity with playdough, check out these links


Enjoy,
 
Play and Learn
 
Katey
 
If you enjoyed this post please feel free to share it


Mash Potato dough / rusks


Watching the H man looking inquisitively at Miss M playing play dough and giving me those eyes that just shouted out
"I want to do it too Mum,"
I was inspired to make him his own, baby friendly, safe
play dough!
 
Ages: 6months - 2yrs
 
 
I made the dough using mash potatoes.
Prepare for your baby so that it is safe for them to eat.
I steamed a couple of potatoes and mashed them with water and nuttelex for H man,
although you could mash the potatoes with your child's drinking milk (breast milk, formula or whatever milk your child usually drinks)etc.
 
I then added a very little amount of plain flour to make it a little firmer. Less than 1/4 cup
You do not need to do this step, however H man had eaten mash potato before (and played with it) so I wanted a slightly different texture.
The picture above is of the dough I used to make the rusks and not the dough I gave him to play with.
I added less flour to the dough I gave him to play/eat than in this picture.
 
 
I simply gave it to him and let him play and eat...
 
 
... and drop it on the floor!
 
You could encourage your little one to sqeeze, roll, pat, squash, pick up and pinch their dough.
 

Your baby is learning

  • about their senses and exploring these, touch/texture, sight, smell and taste
  • developing tiny muscles in their hands and arms which will strengthen their fine motor skills
  • hand eye coordination
  • creativity
 
 
I used some of the dough to make
homemade teething rusks.
I added more flour. I didn't measure I just added till I was able to roll it out.
You could add other vegies to change the flavour!
Simply roll out and use cookie cutters to cut out shapes.
 
Slow bake in 150 degrees or less for 30min
till brown and hard
cool


Gingerbread men shapes are perfect for little hands to hold and chew.
Please note~ they are very hard. H man chewed, sucked and gnawed on his for awhile before getting bored with it. He did not manage to bite off any chunks or pieces, however your child may, so always supervise.
 
Always Supervise your baby when they are eating in case of choking.
 
 
Enjoy
 
Play and Learn,
 
Katey


Sunday, 11 November 2012

Science ~ Investigate taste with Sherbet


Science Investigations for very young children are a wonderful way for them to explore their senses and learn new language to communicate their keen observational skills.
 
While making observations in science children are very often able to use their sense of sight, touch, sound and even smell.
Here is a wonderful, fun and interesting way for your little ones to explore their sense of taste!
 
Making Sherbet


Recipe

 You will Need,
 
1 teaspoon citric acid
2 teaspoons icing sugar
3 teaspoons o f jelly crystals
(you don't need to use the crystals, you can substitute with more icing sugar however it was a great motivator for my reluctant taste tester)
1 teaspoon of bicarb soda / Baking Soda
 
 
Mix all the ingredients together.
 
Touch it~ What does is feel like? Is is wet or dry? Hard or soft? etc
Smell it~ What does is smell like? "yummy"
Look at it~ What does it look like? What colour is it?
 
 
Now taste it!
Miss M was rather confident from her previous observations of touch, sight, smell  that this stuff was going to taste pretty good so she filled her spoon ...
 
 
... Not quite what she expected LOL!
 
 
Talk about what it tastes like. Come up with different words.
Does it remind you of something?
 
How does it feel on your tongue and in your mouth?
What words can we think of to describe it?
 
sweet, sour, fizzing, tickling, zapping, foaming
 
 
Extend this:
 
  • If your child is adventurous and will happily try new foods introduce a taste testing platter. Use your senses to taste a variety of different foods. Include sweet, sour, salty and spicy flavours to develop descriptive language and discussion on similar and different flavours.  Use a blindfold for older children or disguise the food so they have to guess what it is.
  • You could do exactly the same with experimenting with different smells. I will put up a link to an activity we did on smell as soon as I post it!
 
  • Miss M is a reluctant trier of new foods, flavours and particularly textures so during our meals we are very often doing alot of investigating of the new foods on the plate. She'll try and touch it (sometimes she does not like to touch but she will pick it up with a fork, spoon or other utensils- children's tweezers or tongs are fun and motivational). Then she will smell it, all the while we are talking about what it smells like- what 'safe' foods it reminds her of. She will often kiss it which is something we have introduced which she has responded very well too. We may get a lick or a nibble from there woohoo, that is a huge success and worth celebrating for us.
 
As a reluctant trier of new foods I was unsure how this activity would go with Miss M. I hoped that it would be enjoyable and would provoke interest in exploring and investigating new foods and textures!
After her first bite I was a little worried as she put so much in it was an intense experience for her senses. I have been very pleasantly surprised, she seems more keen than ever to make things 'to taste'!
We have been very busy in our kitchen lately!!
 
 
For more science investigations for young children that can easily be done in the home please check out these links,
 
 
Enjoy,
 
Play and Learn
 
Katey


Science~ Lava lamps

 
Children's curiosity to 'find out' and know 'why' makes activities based around science so exciting for them.
 
Children are born keen observers and are always trying to understand the world around them. Science provides hands on opportunities for them to reinforce and build on these understandings.
 
However, it does not always go to plan!
 
One morning I was met with "Mummy, Mummy I want to make something in the kitchen!"
 
Already having a pantry full of homemade treats I suggested
"How about we do some science?"
 
Miss M "Yes, Yes, Yes"
 
"We can use some ingredients to make something very interesting to watch with our eyes!"
 
Miss M "And then we can taste with our mouths!"
 
"Oh no honey, we can't eat or taste this science, it will taste yucky. We will watch it with our eyes and it will look really interesting"
 
 
She seemed happy enough with this...
 
So we began to make, home made lava lamps


To make these, you will need
 
A tall glass
salt
cooking oil
water
food colouring
 
 
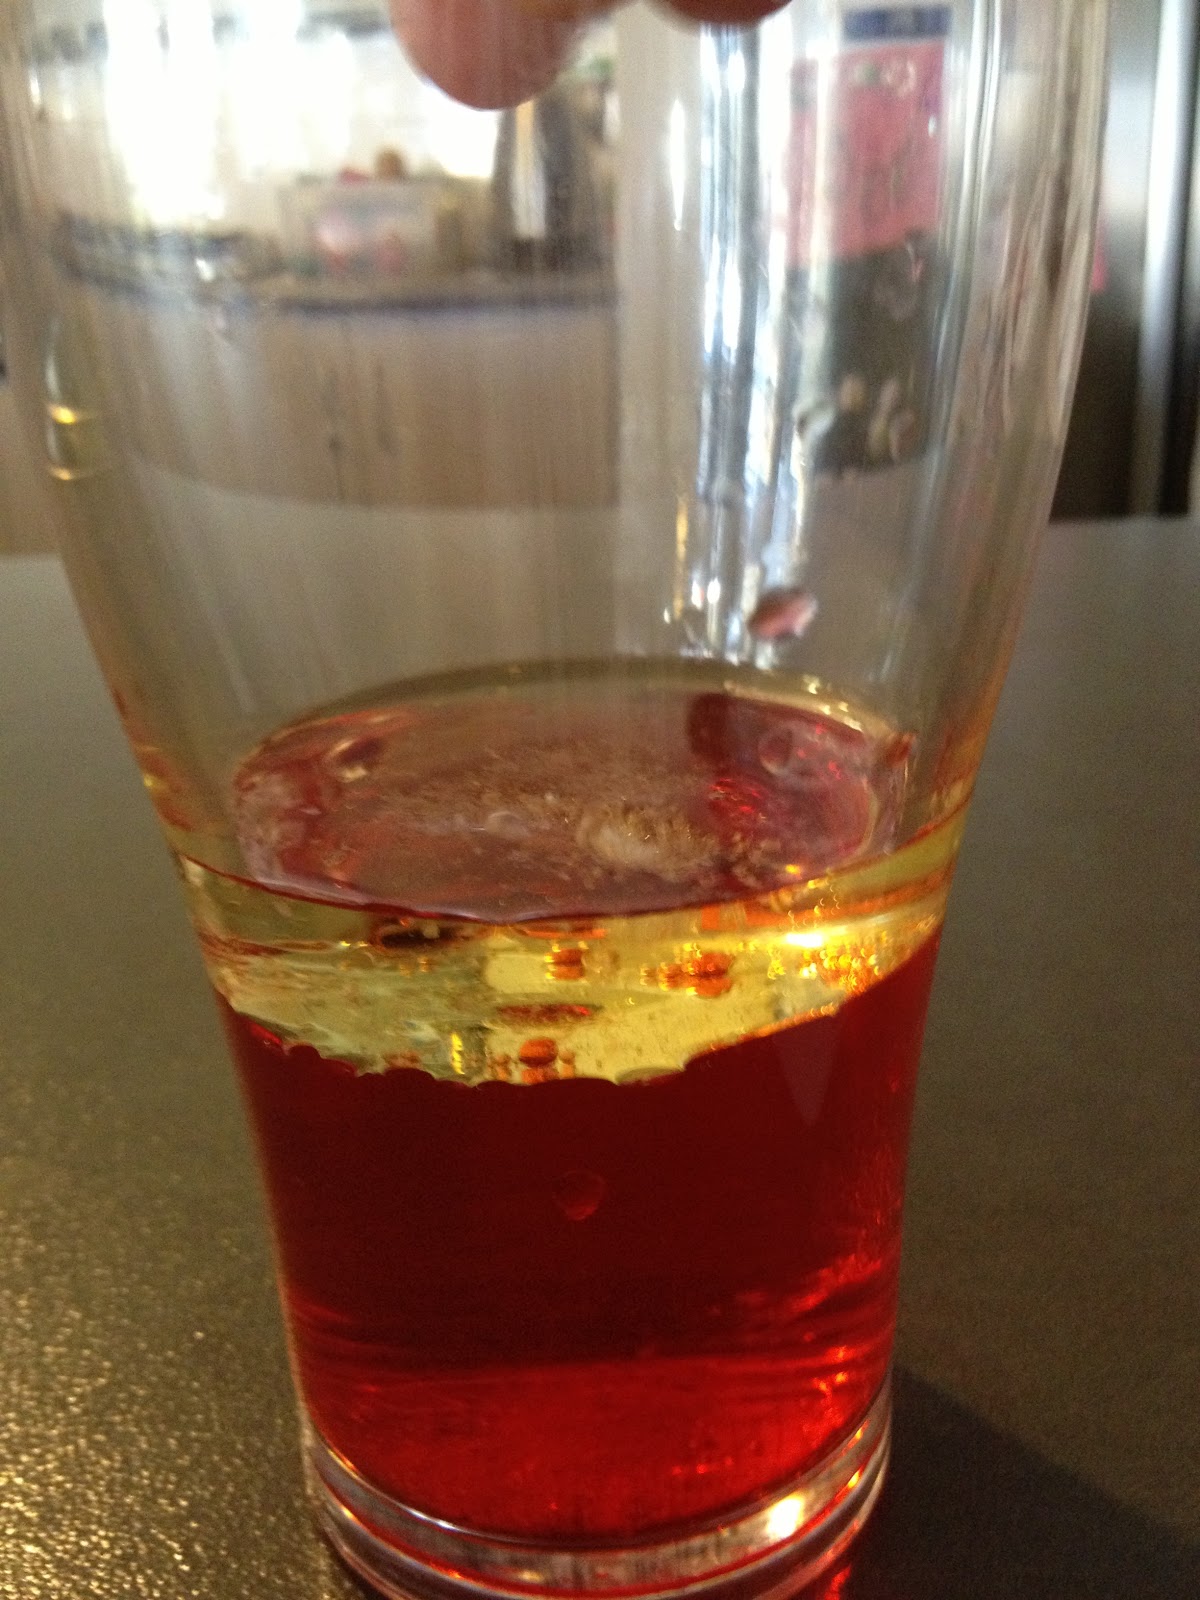
Fill your glass about 1/3 with water and add a few drops of food colouring - of your choice
 
 
Top with your oil.
Oil is less dense/ lighter than water so will sit on the top!
 
It was at this point Miss M went into toddler melt down!
 
I wondered what was going on, what was the problem... this was fun, wasn't it?
 
She muttered out through sobs
"I don't want the fizz, no bubbles, don't do it Mummy!"
 
???
 
"I don't want to make a 'cano' no!"
 
cano ??? oh Volcano, this was reminding her of when we made volcano science with vinegar and bicarb.
But why was this upsetting her, she enjoyed doing that??
 
When I managed to get to the bottom of it, I worked out that yes, she did think we were making fizzing volcano's and she was upset because she didn't want to do that, she knew she wasnt going to get to taste! She had wanted to make something to eat, she wanted to bake!
 
Mummy's fail- not listening to what she really wanted to do and instead trying to get her to do what I wanted instead.
 
We put our 'science' aside for awhile and distracted ourselves with other things!
Luckily the water and oil will happily wait.
 
Now to get back to the investigation
 
 
Sprinkle the salt into the glass and watch

 
 It was really hard to catch in a photo but you will see bubbles rising from the bottom to the top!

What is happening? ~ The salt is heavy and pushes the oil to the bottom of the glass. When the salt dissolves in the water the oil rises/ floats back to the top in bubbles!
Exciting to watch!

I was not going to share the story of Miss M's meltdown. I was simply going to share the experiement, however  I wanted to share that we don't always get things right as parents and things don't always go to plan.

Needless to say the next day we tried this simple science investigation that allowed her to taste, Sherbet

If your after other simple science investigations that are quick and simple to do at home, check at this link to
Milk Rainbows 


Enjoy

Play and Learn

Katey