Tuesday, 11 February 2014

Fun Feet Painting


We love painting and are always looking for fun ways to get messy!

Painting with our feet has always been a hit, however, my main motive for doing it today was to see if Hman would give it a go! Recently he has become quite reluctant to get anything 'messy' on his hands! I wondered if this sensory issue was the same for his feet.
The feeling of paint squelching between your toes is really something!! 


Taking footprints is a great way of recording your children's growth,
we know how quickly that happens!
 I particularly like to record those first precious, wobbly sailor steps.
It's a great memory to look back on and will definitely make you smile.
There's something incredibly special about those first steps.

This activity however, is suitable for any age from those first precious steps upwards.


I set up using long strips of butchers paper cut from a roll of paper from IKEA. Tubs for the paint at one end and a tub of water and a towel at the other end. This is so children can step directly in and wash their feet. It's absolutely not necessary.  


Surprisingly he stepped straight in the paint!! He went back over and over again so this was a success. Children may need to hold your hand as they step in because it's quite slippery! They step in the paint, make sure their feet are all covered then walk across the paper.


Of course they don't just have to walk.
Ask your children to think of as many ways as they can to leave different foot prints?
We tried, tip toes, skipping, jumping and hopping.


They may even like to use their footprints to make a picture!
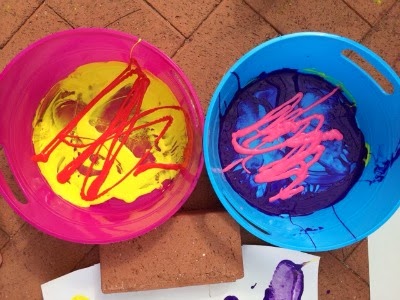


The children requested some more colours!


Such a gorgeous effect!
I plan to frame some, I think it will look lovely!


A great fun way to remember those precious little footsies!!


Of course the children took it further and Miss M was covered from head to tie in paint. Hman used a brush, I though he may be getting close to putting his hands in!!


Enjoy 


Play and Learn


Katey

Monday, 3 February 2014

Shaving Foam Fun


Recently we have been doing lots of sensory explorations at home involving getting our hands mucky! This is because recently I've noticed Hman has been reluctant to play in sand and mud and has started wanting his hands wiped whenever he gets food on them when eating of paint on them when painting. Which is fine, some kids are just more sensitive to these textures I was just curious how far this went with him and what it took to get him to get his hands MUCKY lol!!
 
We had success with him and the water beads, playdough and rice however slime wasn't so successful and since this foam has a similar texture I was interested to see if he would be tempted.
 
For this activity we used shaving foam. It has a delightful, light fluffy, smooth sensation. It also has an odour making this a great activity for exploring the sense of touch, smell and sight. Children are more involved in their learning when more of their senses are stimulated making experiences like this so rich and valuable.
 
AGE: with supervision 12months plus


We squirted the foam into a tray. Hman (2) didn't have the strength to press the nozzle, however Miss M (4) did and enjoyed squirting it out and watching it foam up!
 
To be honest I choose this particular sensory experience as we had a number syringes that we had finally finished with after they had their grommets in and Miss M had her tonsils out!
 

Oh how she loved using the syringes!
I was so relieved we finally had another use for them other than all the medicine I've been giving out the past week.
 
Great fine motor control at work


Squirt!
 
Miss M was able to do this independently.
Hman required assistance and enjoyed using the dropper more as he was able to control that better.


Once they had added all the colour they decided it was time to mix!
Lot's of observation and discussion happening on what they could see happening with the colours.

 
We took some prints of our patterns by placing paper over the foam and patting down.


Wow!
We got to this point with relatively clean hands.
Surprisingly the kids hadn't been tempted to touch.
Miss M had far too much enjoyment using the syringes!
 

But she didn't need any encouragement.
 
the first thing she said was "it feels gloopy!'
 
This activity is great for language development and new vocabulary. Be sure to create opportunities to talk through careful questioning and listening to your child and taking their lead. Model new vocabulary such as slimy, gloopy, fluffy etc.
 
Always supervise your child when playing with shaving foam.
 
Enjoy
 
Play and Learn
 
Katey


Thursday, 30 January 2014

Water beads ~ The fun we had!


I have been wanting to get some water beads for the kids for a long time. It's something I used in the classroom occasionally and the children always loved the sensory experience and so much spontaneous learning happened through their play.

I have not been able to locate any water beads in the shops recently but I know I used to get them from $2 shops. You can purchase them online and I know through eBay, I just had never got around to ordering any. Then walking through my local shopping centre the day before Hman and Miss M were having their surgeries (grommets, tonsils and adenoids) I bumped into a little store selling them! Woohoo- perfect timing as I knew water bead play would be the perfect thing to keep their mind off the pain while we were stuck at home during their recovery period. 


Water Beads before you soak them in water. This is how they look when you buy them.

They come in various sizes and are non toxic making them safe for children to play with. They do swell when added to water so if ingested by your child will swell. For this reason I suggest sticking to the marble sizes water beads. Easily passed if they happen to be ingested, however I advice constant supervision when playing with water beads with children. I was very clear with my children, 2yrs and 4yrs, that they were for playing with and not for eating. They both understood and even my 2yo did not attempt to try one out even though he has been known to eat all sorts if things- he was too busy enjoying the incredible sensation of them!!

Depending on the size of your beads leave then to soak for around 4-6hrs till they have swelled to final size. Drain any left over water and you are ready to play!


Marble sized water beads ready to play with!

Hman smiled and laughed and laughed and smiled the whole time he played with them! He was totally engaged, it was so much just to watch!!
 

To start with I put the water beads out with a selection of scoops and containers and let them play and explore them!

This was great for language development and extending vocabulary. 

Action words 

Scooping,


Pouring, tipping, dumping, filling etc

Describing words 

Wet, slippery, slimy, cold, tickley, squishy, colourful, round, little balls oh balls ...


... Bouncy balls!!
Do be warned, they are very bouncy and very roly and disappeared under all the furniture very quickly!! Of course Gmsn thought throwing them in the floor was hilarious and I had to put a stop to it once it got out of hand as I didn't want baby Finn finding a stray one. Perhaps play outside or put the tub into a bigger tub, or play in the bath tub. 

So much language... I could go on!

Miss M came up with her own little game.


Which kept her mind off her pain for a long time!


We moved onto some colour sorting.


An Alphabet hunt.


Using some tongs
 
Try picking up the water beads with the tongs. What happens, why? 

Of course you could add other resources to your water beads depending on your child's interests and level. Such as 
*plastic animals
*numbers
*dinosaurs
*variety of objects for sorting and classifying. 


Baby safe ways to explore water beads!
 
Of course 6month old Finnboy was curious what all the fun was about, we couldn't let him miss out but of course I needed to make is safe for him! Here are some of the ways I came up with, but constant supervision and common sense is essential.

Testing them out with his feet!
What a wonderful sensation. Remember to model lots of language for your baby such as wet, cold slippery, feet, toes, tickle etc.
 
Water beads in a secure plastic container.
 
Oooh they look interesting!


Water beads in a ziplock bag.


Baby is able to enjoy the sensory experience of the beads, however be very careful because...
 
He straight away took it to his mouth. Constant supervision is essential. 


Although two year old Hman enjoyed exploring them this way too!

These are the ways we have played so far, however we aren't tired of them yet. I will add more ideas to this post as we discover them!!

Always supervise children when playing with water beads.

Enjoy
Play and Learn

Katey 

Tuesday, 17 September 2013

Cardboard tube and strip sculpture - Invitation


I set up this little invitation for Miss M (3yo) to create at her wish.
It was so simple to set up and can be done with every day household items.
Your children will love it to!
 
Learning Opportunities
Fine motor development
Exploring the three dimensional form of tubes
Space and Shape
Creativity


You will need
cardboard tubes of various lengths and sizes. (You can cut to size)
cardboard strips
 

provide scissors and tape
(I pre cut some pvc tape as it is thicker and easier for little fingers to manage)
 
 
Miss M got frustrated initially with the tape...


so she asked for some glue.


Success!!
She gained more confident with the glue and was happy to continue constructing.
She even went back to the tape and was less frustrated.


Her sculpture took many forms as she created and 'played' with the tubes and strips but she eventually completed her sculpture!
 
"It's a race track and cars!"
 
I love it!
 
 
Play and Learn
 
Enjoy
 
 
Katey

Monday, 9 September 2013

Toddler Body Awareness Activity


One of the wonderful things about toddlers is they are developing independence and becoming more self aware. They are able to use their bodies to accomplish an increasing number of skills such as running,
 jumping and feeding themselves. They are also beginning to label and classify objects so naming and recognising their body parts is a skill they are often keen to learn.
 
This is an activity I spontaneously did one wet wintry afternoon with Miss M when she was approximately 18months. It was such a success and something she really enjoyed that I was eager to also do it with H man.
 
Learning Opportunities/ Outcomes: Body Awareness, vocabulary, Fine motor development, social interaction
Appropriate Ages: approx 15-28months
You Will Need: Large sheet of butcher paper, crayons or pencils, some interesting stickers, your child!


What To Do:


1. Say to your child that 'we are going to make a drawing of your body' and ask them to lay down on the paper. Show them the crayon or pencil and say that you are going to trace around their whole body. Talk about the parts of the body as you trace around, for example, 'here we go around your head, past your neck, over your shoulder and down your arm.' You may wish to show them how you do this by tracing around your own and their hand to start with.


2. We then hang 'our body' onto the easel but you can easily keep it on the ground or hang it on a wall or window. Start by drawing on the parts of the face. Your child may wish to do this on their own or you may like to model it, getting them to help. Judging by my attempt you do not need to be an artist!! Your child may also wish to draw on clothes, socks and shoes etc. Be sure to use plenty of modeling language as you interact with your child, 'here is the head, what is it missing? That's right, we need to draw some eyes etc' Be sure to point out all the parts of the body.
 

3. Next I got out the stickers. Most toddlers get really excited about using stickers so it's a great motivation. Ask your child to place a sticker on various parts of the outline body.
 
If your child requires a little help with this you may like to stick a sticker on their actual tummy and then give them a sticker to stick on the tummy of the outline body.
 
Be sure to start with body parts your child is very familiar with so they experience success, then move onto more challenging parts. Be sure to offer plenty of praise and encouragement throughout!


Here's H mans finished body!
Can you see all the parts he was able to identify?
 
 
Extend on This:
*Have your child stick stickers on your various body parts- they'll love it!
*Sing songs like Head, Shoulders, Knees and Toes and sing it again and again changing the body parts, Put your finger on your nose.
*At bath time give your child a washer and ask them to clean their various body parts.
*Decorate your body outline. Add hats, socks, scarves etc and talk about clothing and what parts of the body they go on.
 
Safety:
Be sure to supervise your child at all times while they are using the stickers so they don't become a choking hazard.


Play and Enjoy
 
Katey


Wednesday, 21 August 2013

Peg colour matching game


This simple and spontaneous game came about from the H man's love of playing with my pegs. I love to use different objects for learning and children love to explore new and unfamiliar objects.
 
Miss M loves to help hang out the washing using the pegs however H man, at 19 months has not yet got the strength and coordination for that task and instead loves pulling them out of their container and putting them back in.
Adding in his interest in colours at the moment seemed like a perfect addition to this game!


It's amazing how they figure out what to do without any prompting from adults.
I left out a group of pegs and the matching coloured cups from the cup stacker set and he instantly set about sorting the pegs into their matching colours!
 
He is also developing his hand eye coordination!


Older children will be able to 'peg' the pegs onto the sides of the coloured containers for fine motor practice. Miss M, 3yo had a go at this!
H man really wanted to do it this way and did get a little frustrated that he couldn't work it out.
 
SAFETY WARNING: Never leave your child unattended with pegs. Pegs may contain small parts which can be a choking hazard.


Perhaps the best thing about this little game was it quick and easy and can be done over as many times as your child is engaged.
 
Didn't take long for H man to spread the pegs everywhere and enjoying running over them with his push along ride on, enjoying the bumpy sensation they created.
This game he did do over and over and over and over and over again lol.
Gotta love boys!!
 
Enjoy
 
Play and Learn
 
Katey
 
If you enjoyed this post you may be interested in more peg play in the album 'Peggy Play' on my Facebook page.