Monday, 26 November 2012

Magical Ice Painting ~ Christmas wrapping paper


Miss M loves Ice Painting and we have done it a variety of different ways such as using it to experiment with colour mixing, hiding objects in the ice to find as the ice melts and just plain painting with Ice for fun.

Regardless of how you choose to paint with ice your child will be experiencing their sense of touch as they respond to coldness of the ice. They will be investigating about solids and liquids as they see the liquid turn solid as ice when made very cold in the freezer, then be amazed as it turns back into liquid as it melts with their warm touch. They will be using their creativity and knowledge of shape, colour and lines as they use the ice to paint.

I wanted to use the ice painting as Christmas Wrapping paper so we added a little bit of magic!!


This activity was brilliantly timed thanks to Mother Nature.
On the Friday we put our ice trays filled with magical water into the freezer to turn to ice thinking we may get to paint with it over the weekend.

On Saturday afternoon we had a huge hail storm where ice literally fell from the sky!
Here is one of our downpipes.


We collected some of the hail to keep as ice in the freezer and watched as the rest of the hail melted away in the humid November weather.


Miss M was very happy the hail she collected.
She was not so happy with the very loud sound it made on our patio roof as it came down! Hail can be noisy!!


Here is one of the ice block trays we made to use.
I found this tray at Ikea a number of years ago and it has been well used as painting ice in my classroom and at home!

We choose 3 colours, red, green and yellow and we added glitter to the water. To make the coloured water we just added a few drops of food colouring. You want it quite dark so that it shows up brightly on the paper.
When you do this you will see that the glitter floats to the top, which is great as it looks impressive for little eyes!


We also made a smaller tray of ice blocks and I added a magical surprise inside some of them. I didn't do all of them as I planned on letting my 11month old do some ice painting also and these would pose a choking hazard for him.


Our Ice blocks ready to go!
The long stick ice blocks are fantastic for little hands and make drawing shapes, lines and writing with the ice lots of fun!


We did this outside and it was a little windy, hence the brick pavers used to hold everything down.

H man did pick up an ice block but I was not quick enough to get a photo before he decided, nah I don't want to do this...


...I'd rather play with the ball. Which was fine.
If your child has other ideas go with it, it's no fun for anyone otherwise. They may decide to come back to the task or not but for H man he wanted to play ball instead.
If your baby does want to paint however, always supervise carefully.


Miss M making swirly whirly patterns with the ice!
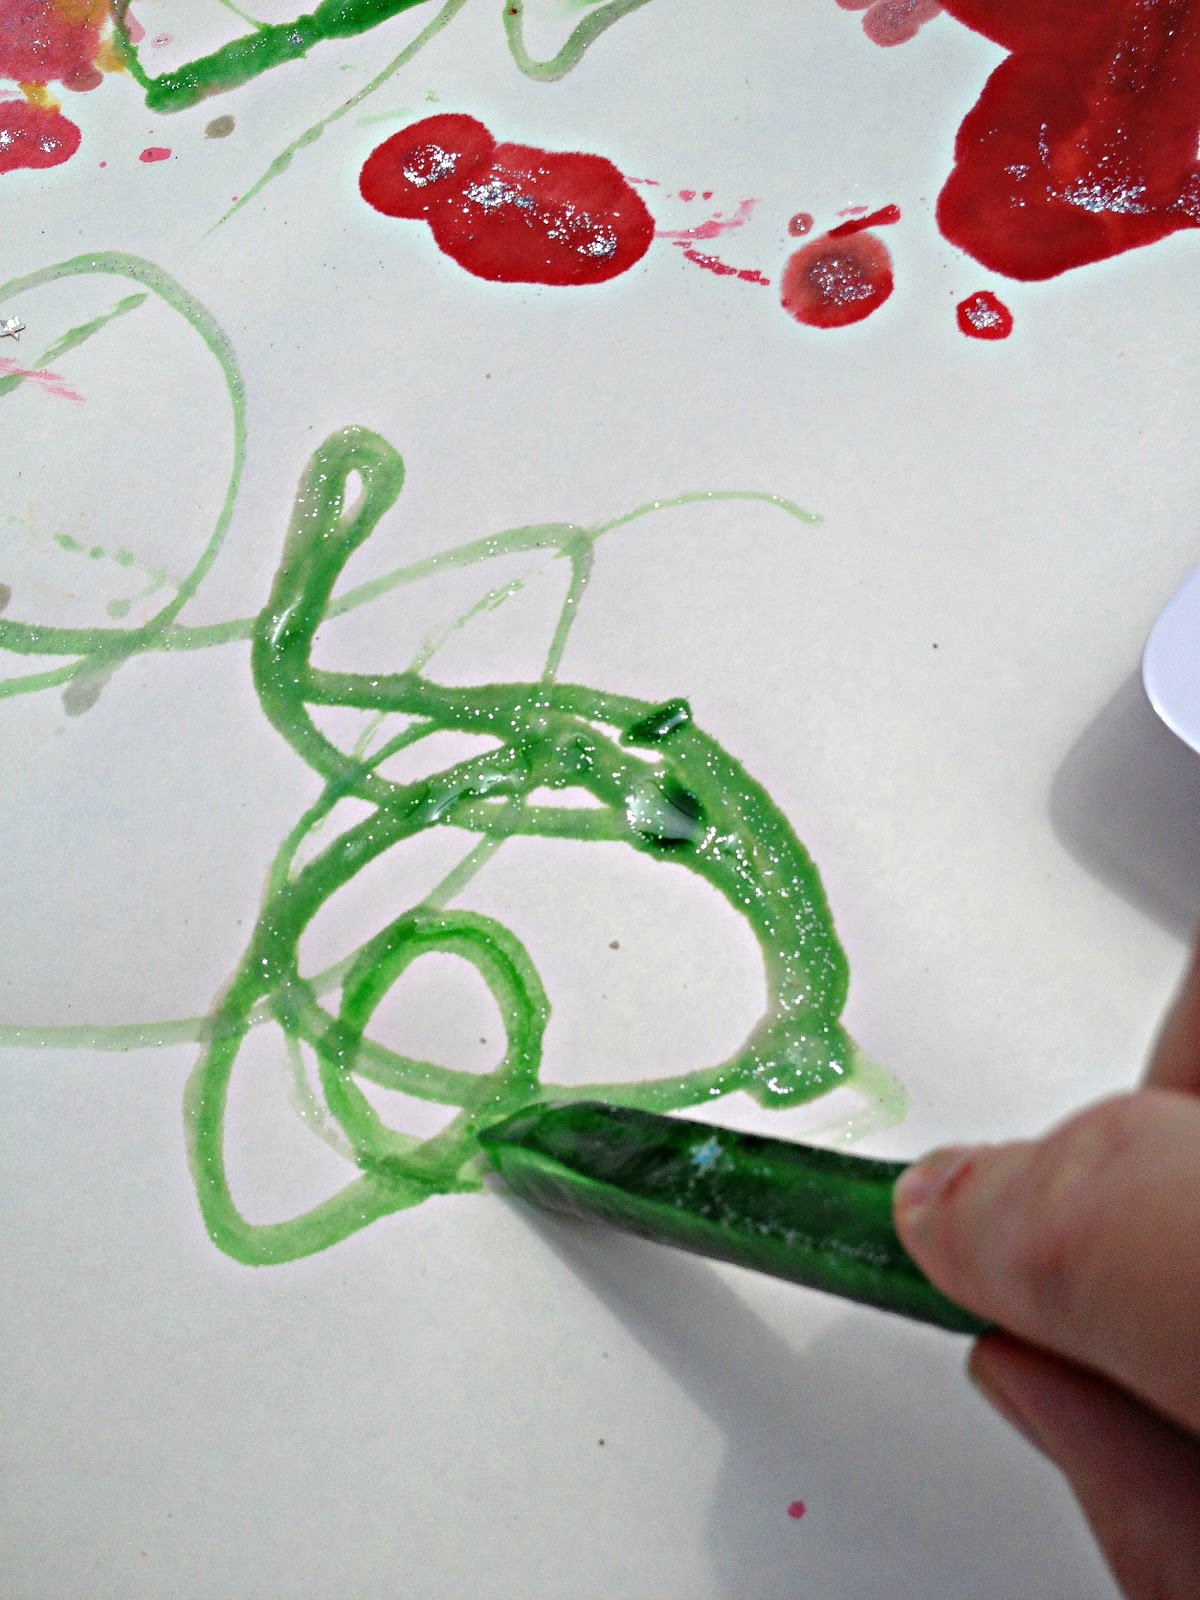

The glitter came off the ice and onto the paper really well.
I was soooo impressed with it!!


Older children could write or draw Christmas themed shapes.
If you weren't making Christmas wrapping paper you could use ice painting for
  • letter writing practise
  • number writing practice
  • name writing practise
  • shape drawing practise
  • Investigating colour mixing
Remember to
  • Talk with your child about what they are doing, seeing, feeling. Give them words for their actions.
  • Ask questions about what they are doing, seeing, feeling. Ask them what is happening to the ice.
  • Ask them to tell you about what they are doing.
  • Get them to tell you about their picture.
  • Make it real and meaningful for them, tell them for example "We are going to use this art that you create to wrap up Nana's Christmas present".
  • Relate it and link it back to real life experiences, "Remember when it hailed? Can you remember what hail is? What happened to the hail? That's what's happening to our ice.


As he played with the ball we left H man's ice to melt as it was.
Looks pretty effective also!


Wow look at that melted magical ice!

Grab some paint brushes and paint with it.
That's what we did!!!


Playing with coloured ice can make little hands a bit messy.
The food colouring does stain the skin but rest assured it comes off after a couple good hand washes with soap.

The experience is definitely worth it!!

Miss M was asking for more magical ice so I can see that we will be doing this one again very soon. Luckily it was so very simple.

It's a great activity for a warm day and you may even get some beautiful Christmas Wrapping paper to wrap up something special!

Stay tuned for more Home Made Christmas Wrapping Paper when I finish my post on Christmas Wrapping Paper 6 ways!

Enjoy

Play and Learn

Katey

If you enjoyed this post please feel free to share it

Wednesday, 21 November 2012

Funny Bodies ~ Puzzles and Oral Language

 
This little task is alot of fun and inspires so much creativity.
 
Children of different ages will benefit differently from this easy to prepare activity.
 
Learning
 
Younger children aged 2-4yrs can consolidate their knowledge of body parts. They will also be problem solving as they put the pieces together to make a person. They will also use their creativity to create a person.
 
Older children 4+yrs can utilise their creativity by making funny, unique, different body creations. Giving them names, personalities, stories and making family members. They can use their body creations as characters in narratives, either orally or written.
Often these characters are wonderful inspiration for storytelling and learning about characterisation.
 
 
All you need is some catalogues and magazines.
 
Clothing catalogues are good as long as they represent
a variety of ages, body sizes, races and both genders.
 
 
Cut out body parts from the magazine. Some pictures will be good for heads,
some are good for legs etc. Rarely do I find a picture that can be used for the whole body. Try to get a range of different poses, sizes, ages, races and a mix of genders.
 
Depending on the age of your children, cut out the bodies into more or less pieces (lol that sounds so wrong to type). For example, Miss M is just turned 3 so I kept it to 3 distinct body areas for our first time at this, being heads, bodies and arms and legs and feet.
You could cut the arms off the bodies and the feet off the legs etc so that there are more pieces to put together.
 
Older children with well developed cutting skills can do this themselves once shown.
 
 
It was really interesting watching Miss M do this.
She actually wanted to find the exact matching pieces for the bodies, so she choose bodies and heads she believed to match. With each person she started with the legs. She would pic up heads and say "that's not right" "no not that one" "ah that one matches".
She did the lady on the left first, then the girl on the right before finishing with the one in the middle. When picking the head for this one she saw the baby head with the moustache and laughed "that's a funny one", she was getting that these were
funny bodies.
It was interesting that she made a representation of our family, minus the H man.
I was not so impressed with my representation being much larger, what was she hinting at here lol!!
 
She created this picture all by herself and had no trouble working out where the pieces needed to go. Next time I'll make it a little trickier with more body parts.
 
I'm looking forward to doing this one again with her.
 
This was always a favourite lesson in my classroom when learning about characterisation. The children would create the most fantastic funny bodies!
 
Enjoy
 
Play and Learn
 
Katey
 
If you enjoyed this post please feel free to share


Tuesday, 20 November 2012

What's in the bag? Investigate touch

 
Miss M has been very interested in investigating her senses lately.
 
Through investigating her senses she is becoming more self aware of her own body as well as the world around her.
 
In this post I share how we investigated our sense of touch.
 
I have a wonderful surprise box that I use in my classroom and my 4 and 5yrolds love it!
 
 
At just 3, Miss M was not so keen to put her hand in this one.
Her sense of real and imaginery is not as well developed just yet.
 
I also have a wonderful surprise bag, but it was too big for what I had planned.
 
We used simple paper bags bought at the supermarket.
These bags can be reused for a number of art ideas.
 
 
I numbered the bags 1-5 so Miss M could choose and name which bag she wanted to investigate first!
 
Choose items of different textures, sizes and shapes from around the house to put inside each bag.
 
Ideas Include: loofah, sponge, scourer, rice, pebbles, brick, utensils, soap, soft toys, pegs. You can put wet items like slime, water, goop in small bowls inside the bags. The ideas are endless just make sure you have a variety of textures for your child to touch and explore.


The temptation to peek first is common.
Explain that they are going to use only their sense of touch to guess
what the object in the bag is. We aren't going to use our eyes to see,
but we are going to use our hands to touch.
 
Reassure your child that it is safe for them to put their hands
inside if they seem hesitant.
 
Have them predict what they think they might feel inside to prepare
them for the experience.


Hmmm what could it be?
 
Your child may want to whip the item out straight away.
Remind them that we are keeping it inside the bag so that we only use our hands to touch and not our eyes to see.
 
Ask them about what they can feel, don't just get them to guess.
Is it hard, soft? Wet or dry? Rough or smooth? What shape is it?
Can you feel any parts or pieces?
 
Ask older children to describe the object they are touching.
 
This activity couldn't be simpler, how bout giving it a try!
You can do it again and again with different objects.
 
Fantastic for developing Descriptive Language
 
 
A little extra~
  • When exploring touch I like to go outside. There are so many sensations and opportunities to experience touch. Children can feel the wind on their skin and in their hair. Touch grass, plants (as long as they are safe), trees, bark, paving, water etc.
  • Hands on Sensory experiences are great like this one ,

 
  • Younger children and babies will love this,

 
Baby treasure box
Always supervise babies when they are playing.
 
 
I hope you enjoy exploring the sense of touch with your little ones.
 
Play and Learn,
 
Katey
 
If you enjoyed this post please feel free to share it


Sunday, 18 November 2012

Music and Movement~ Playing with scarves

 
Playing with scarves is such a wonderful sensory activity for babies and children alike.
 
When scarves are moving to music the baby or childs sense of sight is stimulated by tracking the bright colours with their eyes. The auditory sense is stimulated by listening to the music and the sense of touch is stimulated by the feel of the scarf on their skin.
 
They are also learning about object permance and developing motor skills.
 
Suitable ages: 0+
 
 
The best thing about scarf play is that it is so simple.
Most of us will have some scarves that could be used.
You can use sheer fabrics or solid. Any pieces of light material will do.
 

1. Play Parachute

 
Lay your baby down in a comfy position.
Put on some calming music.
Wave the scarf above your baby so that it is floating up and down.
 
 
Your baby may reach up and try touch the scarf!
 
 
Let the scarf drop so it floats down onto your baby.
 
What a magical sensation for your little one!
 

2. Play peek-a-boo

 
Peek-a-boo games are great for developing object permanance.
Object permanance is the knowledge that objects still exist even when they can't be seen. This skill is essential to cognitive development since only after a baby can imagine an unseen object can they remember, reason and plan.
 
See through scarves are great to use for introducing this game. Move onto more solid materials as your child becomes familiar with the game.
 
Read about another peek-a-boo game here hide-n-seekin fun
 
 
Be sure to put the scarf on yourself as well as soft toys and other objects!
 

3. Scarf in a tub

6months +
 
 
Simple and easy to make. Any container with an opening will do, tissue boxes are brillant.
Hide the scarves inside and let you little one have a great time pulling them out!
Better than pulling out the tissues lol!


4. Dancing

If your baby is not yet walking, simply put on some of your favourite (child appropriate) music, hold your baby in one arm and a scarf in the other and dance around to the music together.
Or, lay your baby down and dance the scarf around to the music for your baby to track with their eyes.
 
12months +
 
 
For older children let them explore the rhythm of music by dancing
free style with the scarf.
Let them experiment with how many ways they can move their scarf.
 
Can you make it go up and down, sideways, around and around?
Can you make the scarf dance on the floor or wave it high in the air?
Move your scarf like a rainbow.
Move your scarf slowly when the music is slow and quickly when the music is fast.
Throw your scarf up in the air then catch it.
Weeve the scarf through your legs.
 
The opportunities are endless!
 
How do you like to play and learn with scarves? Please share your ideas here.
 
Enjoy,
 
Play and Learn
 
Katey
 
If you enjoyed this post please feel free to share it, thank you.


Discover wet and dry = sensory play


Children respond better to learning experiences when more of their senses are involved.
Sensory experiences are wonderful opportunities for learning and they are so much fun!
 
On this day we were investigating wet and dry!
 
Goop is a wonderful sensory recipe for learning wet and dry.
It has been one of Miss M's favourite things to do since she was around 15months!
 
 
 We started with 2 large storage container lids.
 
Fill one with cornflour.
Let your children touch and play with the dry cornflour.
Talk about how it feels, what happens when you pick it up, when you drop it and when you blow it. How does it feel on your skin?
 
 
Miss M (3yrs) was reluctant to play with the dry cornflour but she happily used a paintbrush to draw shapes and pictures in it.
 
This is similar to using a


We also filled a 2nd large storage container lid with a little water.
 
It's hard to see the water but what a surprise for H man discovering it is wet!


He climbed straight in.

 
Splashing!
 
 
Taking a closer look.
He actually put his face and mouth right in. For babies, using their mouth is their favourite way to discover. This is because the sensations in the mouth are more highly developed in babies. For older babies, sensations from teething gums draws the babies attention to the mouth.
 
 
I added bottle tops to the water as a little extra experience and to stop him eating the grass lol!

 
We added some water to the cornflour.
 
Now is it wet or dry?
 
 
To Make Goop
 
Just like with most of my cooking I don't tend to follow exact amounts when making goop.
 
All you need is,
 
cornflour
water
food colouring
 
The more cornflour you use the more goop you will make. Simply add small amounts of water at time and play. You will understand as you play the strange and wonderful sensation that is goop! You will be able to judge when you have enough water. Be careful not to add too much but if you do, simply add more cornflour.
 
Unlike the dry cornflour, Miss M loved the sensation of the goop!
What happens when you pick up the goop?
 
 
You must try this!
 
 
I was surprised H man didn't get into the goop as much, he was happy with the water and bottle tops.
 
 
 Had to try this sensation out with our feet also!
 
 Make sure to,
  • Talk about what your children are doing, give them the language that represents what they are doing. Providing them with new vocabulary.
  • Ask questions about what your child is doing, feeling, seeing and experiencing. Give them time to answer. 
  • Ask predictive questions, what do you think will happen if...? If your child struggles with this model for them "I think maybe..."
  • Test it out and see
  • Follow your child's lead and where they want to take the play
  • Let them get messy and explore all their senses, this is safe and non toxic.
 
 
For more sensory play ideas for toddlers and babies you may be interested in


Enjoy,
 
Play and Learn
 
Katey
 
 
If you enjoyed this post please feel free to share